Assembly Services in Melbourne
Contact us now for a free and fast quote,
our Assembly Prices are Unbeatable!
Assembly of:
IKEA | BBQ | BED | SHED | FURNITURE | HOME GYM | TRAMPOLINE
Our Assembly services are available:
From Monday to Sunday between 07:00-am till 21:00-pm in Melbourne
Need an assembly done during public holidays or after hour? Please let us know!

We are extremely flexible:
Usually, we are able to commence and finish the assembling within 24 hours! Need something faster? Please let us know!

We are quality focused:
We assemble the goods perfectly, tidy up the area and leave you to enjoy your new furniture or equipment.

Please feel free to text us, email us or simply call us:
We will give you a free quote in no time at all! So why not try us?
Call us:
0455 369 362
Furniture assembly guidelines
In this essay I would like to share a few ideas and thoughts about my experience about the furniture assembly business in Melbourne, mostly about IKEA products and a few ideas about other products like fantastic furniture, super amart, office furniture and any kind of furniture comes in a flat pack.
Pax wardrobe assembly in Melbourne:
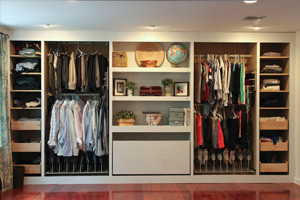
One of the most complex systems IKEA has is the PAX wardrobe system. I really enjoy assembling pax wardrobes because it is a real challenge sometimes and it feels good at the end seeing a complex good looking wardrobe with lots of storage. One of the most important things about assembly is the place where the wardrobe is placed. If the surface is not even, has a slope in it the wardrobe will tend to tilt in a direction and that will have an effect on the doors or if it is a sliding door than the sliding door will not work properly, so in my opinion it is crucial to have the place where the wardrobe is required as flat and even as it is possible. Assembling the pax wardrobe frame usually is not a big challenge if we have enough space to work. Most of the time when we have to assemble pax wardrobe with sliding door the space is too small to build the wardrobe frame laying the parts on the floor (usually we use the cardboard or drop sheets to protect the floor and the wardrobe frame) so we have to assemble the pax wardrobe upright which is almost as easy like assembling the wardrobe on the floor just takes more time because with the highest wardrobe (being almost 240 cm high) we need to use a step ladder to reach the top comfortably. If there is no one to help the hardest thing to do is to put the top part in place and to nail the back panel to the frame. If you are alone it is a good strategy to push and hold the back panel against the wardrobe with one hand holding one nail in position and with the other hand holding a hammer, hammer the nail in the pax wardrobe ,don’t worry if the back panel moves down a little ,just don’t hammer the nail completely in and move the other top corner of the back panel in position and secure it with a nail and then go back to the other corner remove the nail ,move the corner of the back panel in position and secure it with a few nails. Usually it is recommended to use the IKEA provided plastic nail clips to hold the nails in position to nail the back panel all along the edge so we will not have any nails coming out at the side panels ruining the look of our new wardrobe. When we are done with the assembly of the back panel, move the pax wardrobe frame in the position where we want to have it and carry on with the rest of our frames and put them side by side to each other. The next important step is to join the pax frames together using a quick grip to hold the two separate frames accurately even to each other on the top and the front and drill a hole through one pre drilled hole on the inside top of the frame, we will know that the position is accurate if the drill bit comes out on the other side of the next wardrobe at the same spot through a pre drilled hole. Through the hole we need to put the IKEA provided screws (one mother and one father 🙂 and tighten it well. Following the same assembly procedure we have to do the same thing at the bottom and somewhere in the middle. Once the assembly of this part is done we can put the doors on or the sliding door. We have to try to set the wardrobe as straight as we can, sometimes it is necessary to secure it to the wall. Than we can adjust the doors so the top edge forms a straight line and we can mark the place for the handles and drill the holes for the handle screws. If this is done, the hard part of the job is over and you can tend to the insert such as drawers shelfs clothes rails wire baskets and more.
To fix the pax wardrobe to the wall you will need to consider what your wall is made of, if you have a skirting board and you don’t want to remove it you need to put a piece of timber along the wall where the IKEA provided brackets will be on the top so the wardrobe will stand straight and secure the wardrobe to the timber.
Besta systems are my next favourite furniture systems what IKEA has in Melbourne. Mostly used to build entertainment systems to provide ample storage and good look to home theatre sets both audio and video.
Besta assembly in Melbourne:
The besta wardrobe and storage units can be put in various places according the plan is required. IKEA has different units for different purposes so everyone can find the best choice for the plan. The most useful design is to form a square with the besta units on the wall, with a row of bestas on the bottom and two columns on the two sides and a row of bestas on the top between the two columns forming a bridge and leaving a hole for the TV and for the TV bracket if you want to have the TV installed on the wall. First we have to do the assembly of the frames and put them into position. It is a good tactic to put one side of the column into position and start to mark the places where the rest of the units will be especially at the top row. Put a straight piece of timber on the top of the column and place a spirit level on it thus allowing us to draw a line outlining the top of the bridge and giving us a point from where to start the wall mounting process. Usually we use few pieces of timbers to mount on the wall because there is an edge at the back of the BESTA unit which is perfect to support the unit to put on. We use the IKEA provided plastic brackets too thus giving us a really secure method to mount the BESTA units on the wall. If the wall is a brick or concrete wall we have to drill a hole and put the plastic dowels in it and screw the timber to the wall, or if it is a plaster wall we need to find a stud or a few studs to make it really safe and use wall mates to secure the rest of the timber. If this is done we need to put the BESTA unit resting at the back (so the timber can’t be seen) on the timber and screw a few timber screws through the back of the BESTA unit in the timber. Once this is done we can carry on with the rest of the pieces and do the assembly of them together making sure that the edges and the top and bottom parts are flush with each other. IKEA provides special besta screws for this step. Than we can install the doors, shelves, drawers and the rest of the inserts.
One of the biggest issue with bestas is some of the customers don’t know that IKEA has special TV units that has a slot where the cables for the TV and for the stereo can be guided through and buy the ordinary units and we have to alter the unit to meet the requirements.
The next and one of the most popular products IKEA has is the billy book case. It provides a really comfortable and good looking solution for books, CDs and other stuff.
Assembling a billy book case:
With the billy book case one of the most important issue is again the surface the book case will be standing on ,if the surface is not even it will be very difficult to install the billy book case and its components as it should be. While building the book case don’t forget to mark the middle shelf position on the edge of the back of the book case so when you need to nail the back panel to the middle shelf you will know where to do it. IKEA provides screws to join the units together thus forming one solid piece of a unit and you can secure it to the wall so it will not tip over. For the billy book case there are not so many inserts, usually just doors we need to put on.
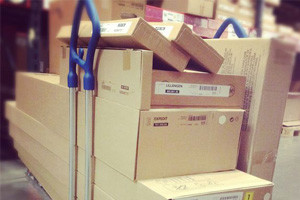
Everything comes in a flat pack from IKEA is designed in one of the best factories in the world. They have evolved for years and have a quality standard really high so if you follow the instructions provided by IKEA you will get what you want, what you paid for. It has happened to me to blame IKEA and its instructions for being not clear and not correct ,but it always turned out that it was me who made the mistake. They always provide the necessary parts and if there is a mistake or damage it is usually because of a human error. There is one thing that probably IKEA should improve and that is their software they use to plan how a wardrobe system will look like once it is built because sometimes it is hard to figure out what is what in the picture and sometimes the software let you to plan the wardrobe in such a way that is not really feasible in reality.
In this part I will share some information about the brands you might come across in Australia regarding the flat pack furniture business such as superamart, fantastic furniture office furniture matt blatt and who knows how the list should continue.
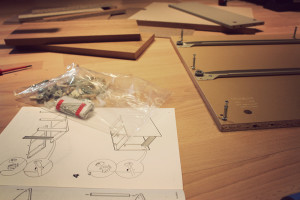
The few main things you should always follow are to make the place where you want to pace the new furniture as even and clean as you can. It is always recommended to follow the instructions and not to skip a phase. Take your time be patient ,it is important at the beginning to do so because if you make a mistake at the beginning maybe you can carry on and when you realise that you had made a mistake later ,you have to disassemble hours of work to correct the mistake. But sometimes you should not follow the instructions and do whatever you need to do to build the furniture because of lack of space or just for the comfortable work.
Trampoline assembly in Melbourne:
My favourite things is the assembly outside are trampolines because it gives me an opportunity to work outside. One of my favourite brands is springfree because it is one of the best products in the market and I really like to build something for the kids that is fun and safe in the same time.
The outside furniture comes in a flat pack is not much different from the inside flat pack furniture except for its coating and the quality of materials used and there is of course less variety of outside furniture available.
A couple of things you should keep in mind before you start to work on a flat pack furniture or appliance. Hitting and forcing parts not always result a good outcome. It is worth to spend time making sure how the assembly instruction guides us. Always clear the site where you want to put the furniture. First measure it and then buy the furniture. It is not always possible to do the assembly of the furniture in the way you first planned.
If you don’t have the time to do the assembly of flat pack furniture please don’t hesitate to call us, we are capable of building everything in the market.
Kind regards,
Chris.


